Sunday, 23 December 2012

Another go.


Once was not enough! I felt I should have one more go at drawing out the jigsaw - aiming to get the correct route for the laser and using the pen tool instead of live trace. I also thought I would make the jigsaw a little larger.


The cuts are in a slightly different place. I was trying to avoid too
sudden or sharp a join.  Everything was fine, except
ending up with a tiny, tiny earwig.

Getting the laser bug.

While I've been painting the jigsaw I had other ideas about using the bee and flower design further. And having got a little braver with the laser cutter I wanted to try out something else. I liked the idea of making a box using just one flower and one bee, possibly using the bee as a clasp. I played with the notion of making the insect drop into a space in the lid, or using a magnet and securing the bee only on one side. For the moment it is this one design that won out.


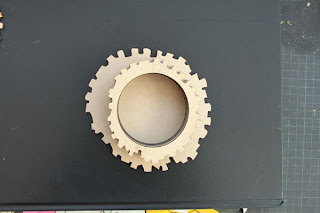
First attempt. The rings are to be stuck together to form the
box. 

Spot the mistake! I altered the size while adjusting something
else on the laser computer and took no note of it. It was
easier to go back to the laptop.

The shapes match up perfectly but I rather like them
off kilter.

Second attempt. Smaller and all fitting, plus the lid is hinged
thanks to Steve.

What it will, sort of, look like when finished.

Tuesday, 18 December 2012

Branching out.

We are being encouraged at college to create animations (simple is good) so that our work breaks away from paper. So I took photos while painting the rose and bee motif. Setting the camera up on a small tripod and the tripod up on several recipe books, an atlas and an all important notebook to achieve the right height.

There was a slight problem in that I didn't get the painting done on the same evening - and therefore, nor the photos - and things had been moved! So there was a whole size discrepancy when I cropped the later pictures on Photoshop to hide the movement and then found out the canvas size to be different and needed to infill them to correct this. I was very chuffed when I learned to use the record Action button on Photoshop as that cut out having to individually import and alter about 100 pictures.

As with learning anything new, it all took a very long time to put together and ended with a very short, very amateur film, but I'm pleased.


It really is short, but happy!


Sunday, 16 December 2012

Illustrator in the hands of a novice...

Hello and good evening. First an apology for the two name changes to the blog - something else I'm learning - so many fun and clever names for Art/Crafts/Illustration blogs...so many already used! So in the end - though I'm not promising anything - it is now name based.

Anyhow, back to the story of the jigsaw. Having really enjoyed the process of designing I then had to transfer the lines into vectors through Illustrator so that the laser cutter could read it (I had help with the small rose and bee design, so I was all on my own for this one). It took a day of frustration and much reference to the internet. So many great tutorials out there, but then you have to know exactly what you asking for...it took a while.

Redrawn on tracing paper.


In the end I ended up redrawing the sketch onto tracing paper, scanning then live tracing on Illustrator - I thought it was going really well until I noticed these loops. It was time to call on professional help.

A bit faint, but lots of extra loops that the laser
would follow if left in.


So two days after, at college I was lucky enough to find our great digital designer tutor Dom and ask for help. It took him a matter of moments to tell me what was wrong, how to put it right (easy, but time consuming) and that I should have gone to see him sooner!


FINALLY it was ready to go and I took it to the 3D technical department. The vector was fine, though an added layer of possible consideration was pointed out to me by Steve - a complicated design like this is also sending out a track line - and perhaps because it had been done by live trace the cuts were to be made in what looked more like a paint splatter then an Etchasketch and if the big shapes are cut out first and drop down, then when the laser comes to the small parts within the larger pieces they may not cut out and instead only etch....I set it off and waited. It is very exciting to see the machine working by itself, but cutting out a pattern you've been working on for many days.  

Voila! This time I was lucky and the laser cut things out just fine.


Friday, 14 December 2012

Choosing the right flowers.

Hi, from where I'm sitting I can smell the burnt, sweet aroma of laser cut Mdf. My 2nd attempt at a jigsaw is sitting in a plastic bag at the side of the laptop here. But that's skipping ahead.  I know that bees, butterflies and other pollinators are attracted to large, open flowers where they can easily get to the nectar, and after some more research I drew up a list of flowers to include in the final piece and then chose from that - looking for variety of shape and colour.  So...(these photos I had taken earlier in the year).

Purple Coneflower and Small Tortoiseshell

Bees on Thistles.


Thursday, 13 December 2012

Making the picture.


It took a while to figure out the look of it, till I drew it in the round. The insects are cut out separately so I could move them around the picture...they get lost all over the table and in the sketch book.


While thinking about the main image, I used part of the design as a mock up to learn about the use of Illustrator and the laser cutter.

Cut out and ready to paint. This is more of a 'thing' then
a jigsaw!

 I was considering fully painting each
layer, and keeping them separate, but
thought I'd just lose the pieces.


Fully painted, not yet varnished.


Wednesday, 12 December 2012

Making a Start.

Already many days have gone by with tea drunk, pens chewed and screens stared at, before this blog is finally written. I am in the middle of a contemporary illustration assignment and it was pointed out to me that soon I will have finished the project and have forgotten all the processes, small triumphs and lumpy lows that have happened along the way.

So here goes...I was wanting to explore creative ideas around a small bee and two frilly shapes I cut out of mdf with our colleges exciting laser cutter. They were being made into brooches and I was kinda pleased with the result (I also discovered that mdf is a wonderful surface for acrylic paint). The bee theme tied in with an earlier project from our first year when we had to make a book of superstitions and I chose to make mine concerning the folklore surrounding bees.


On wondering how to take the theme further I thought over the ideas of making jewellery, perhaps fitting one piece into another which lead me to think about a jigsaw. 


Sketch book page; working out ideas of what kind of  jigsaw might be the more interesting.


On deciding to make complex jigsaw, rather than one for young children, I next needed to choose the plants and insects to include and the size of the finished item. The drawing above was my attempt at scaling the various creatures.